Quick mmirestriktor Tutorial
The stats::lm engine.
This tutorial should help you get started with the mmirestriktor Shiny application. mmirestriktor is the Mighty Metrika Interface to restriktor. restriktor is an R package which has tools for working with informative hypothesis testing. To learn more about restriktor and informative hypothesis testing, visit https://restriktor.org/.
The mmirestriktor app can be used to import your csv data and then implement the iht() and restriktor() functions from the restriktor package. Please note that the current version of mmirestriktor only uses these functions with default settings and mmirestriktor does not currently support the lavaan SEM functionality; as such, users will need to access iht() and restriktor() using the restriktor package in an R session to gain the full power and functionality of informative hypothesis testing.
Here, we will work with the data_f.csv file which you can download from the npboottprm GitHub.
Step 1) Open the Application
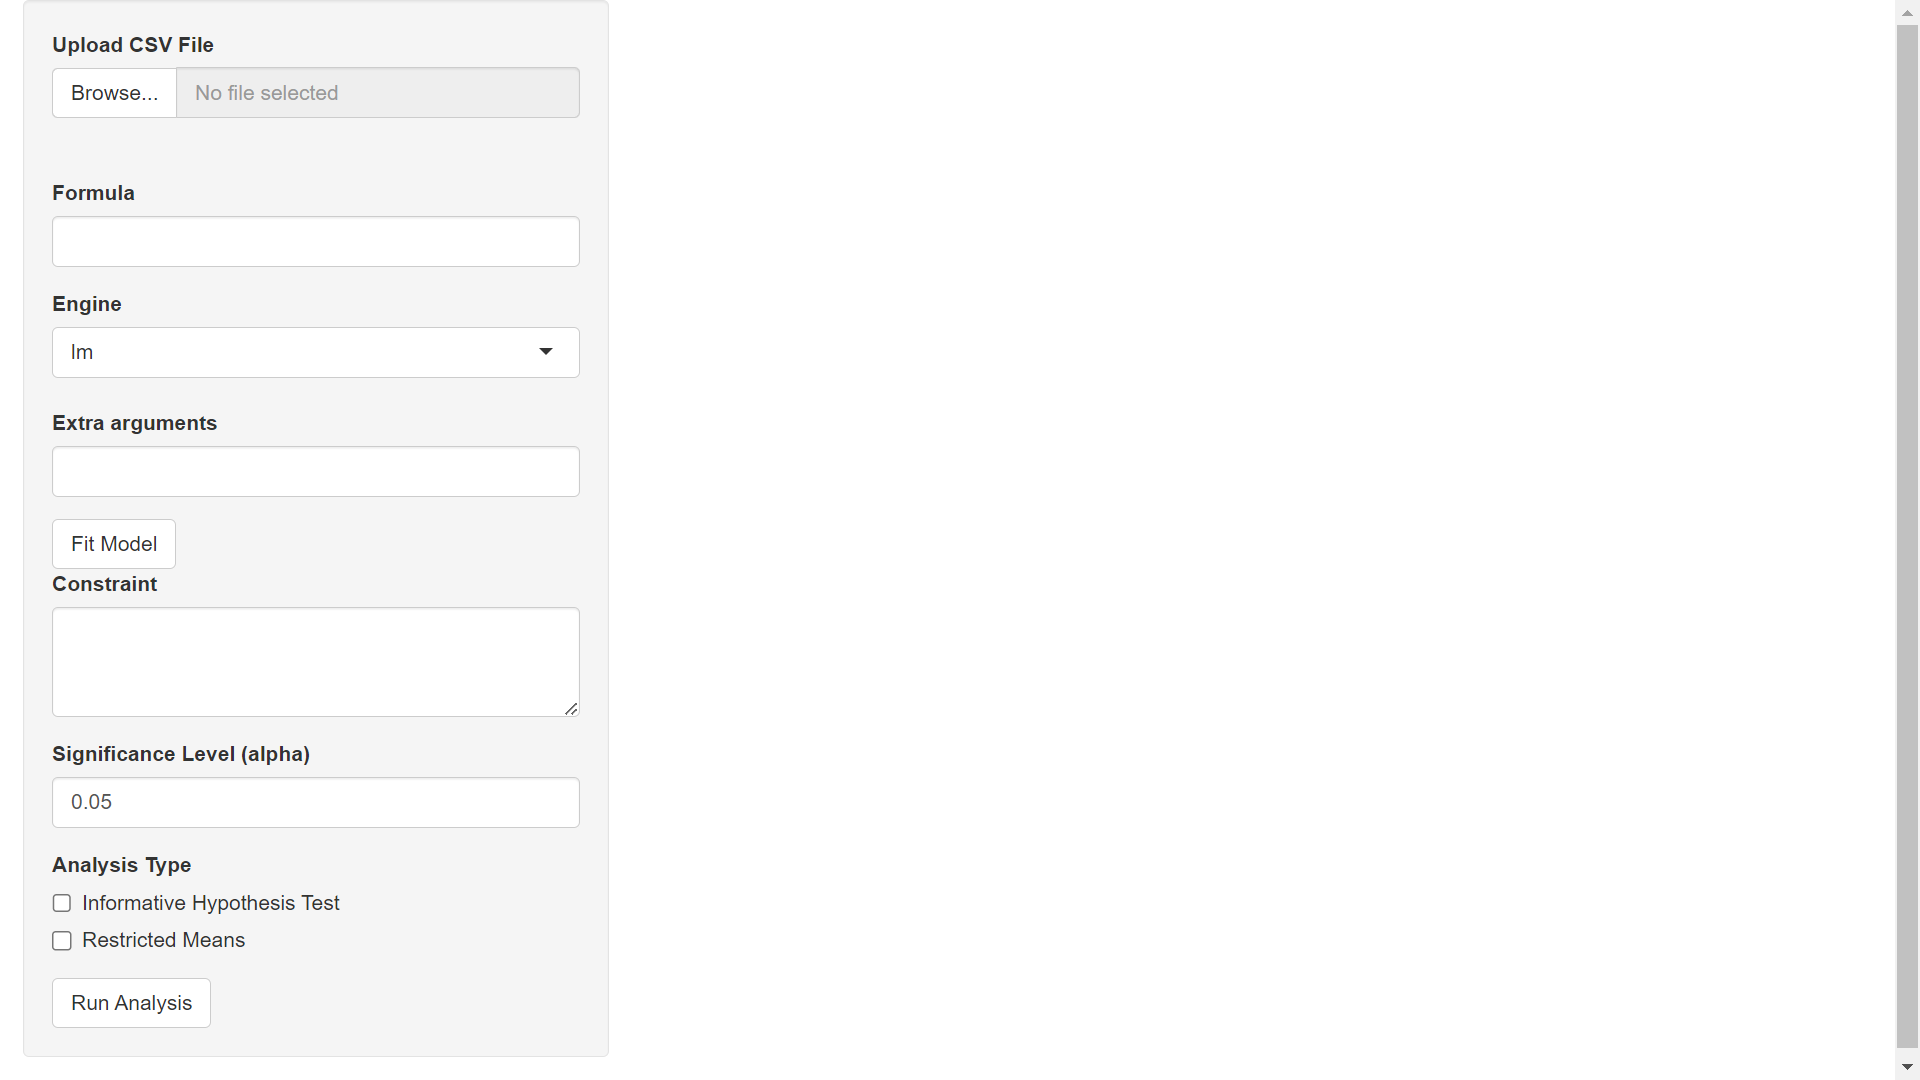
To open the mmirestriktor Shiny application, go to https://www.mightymetrika.com/mmirestriktor and click on the mmirestriktor button. This should open up the following application:
Step 2) Upload Data
The data for this tutorial looks like this:
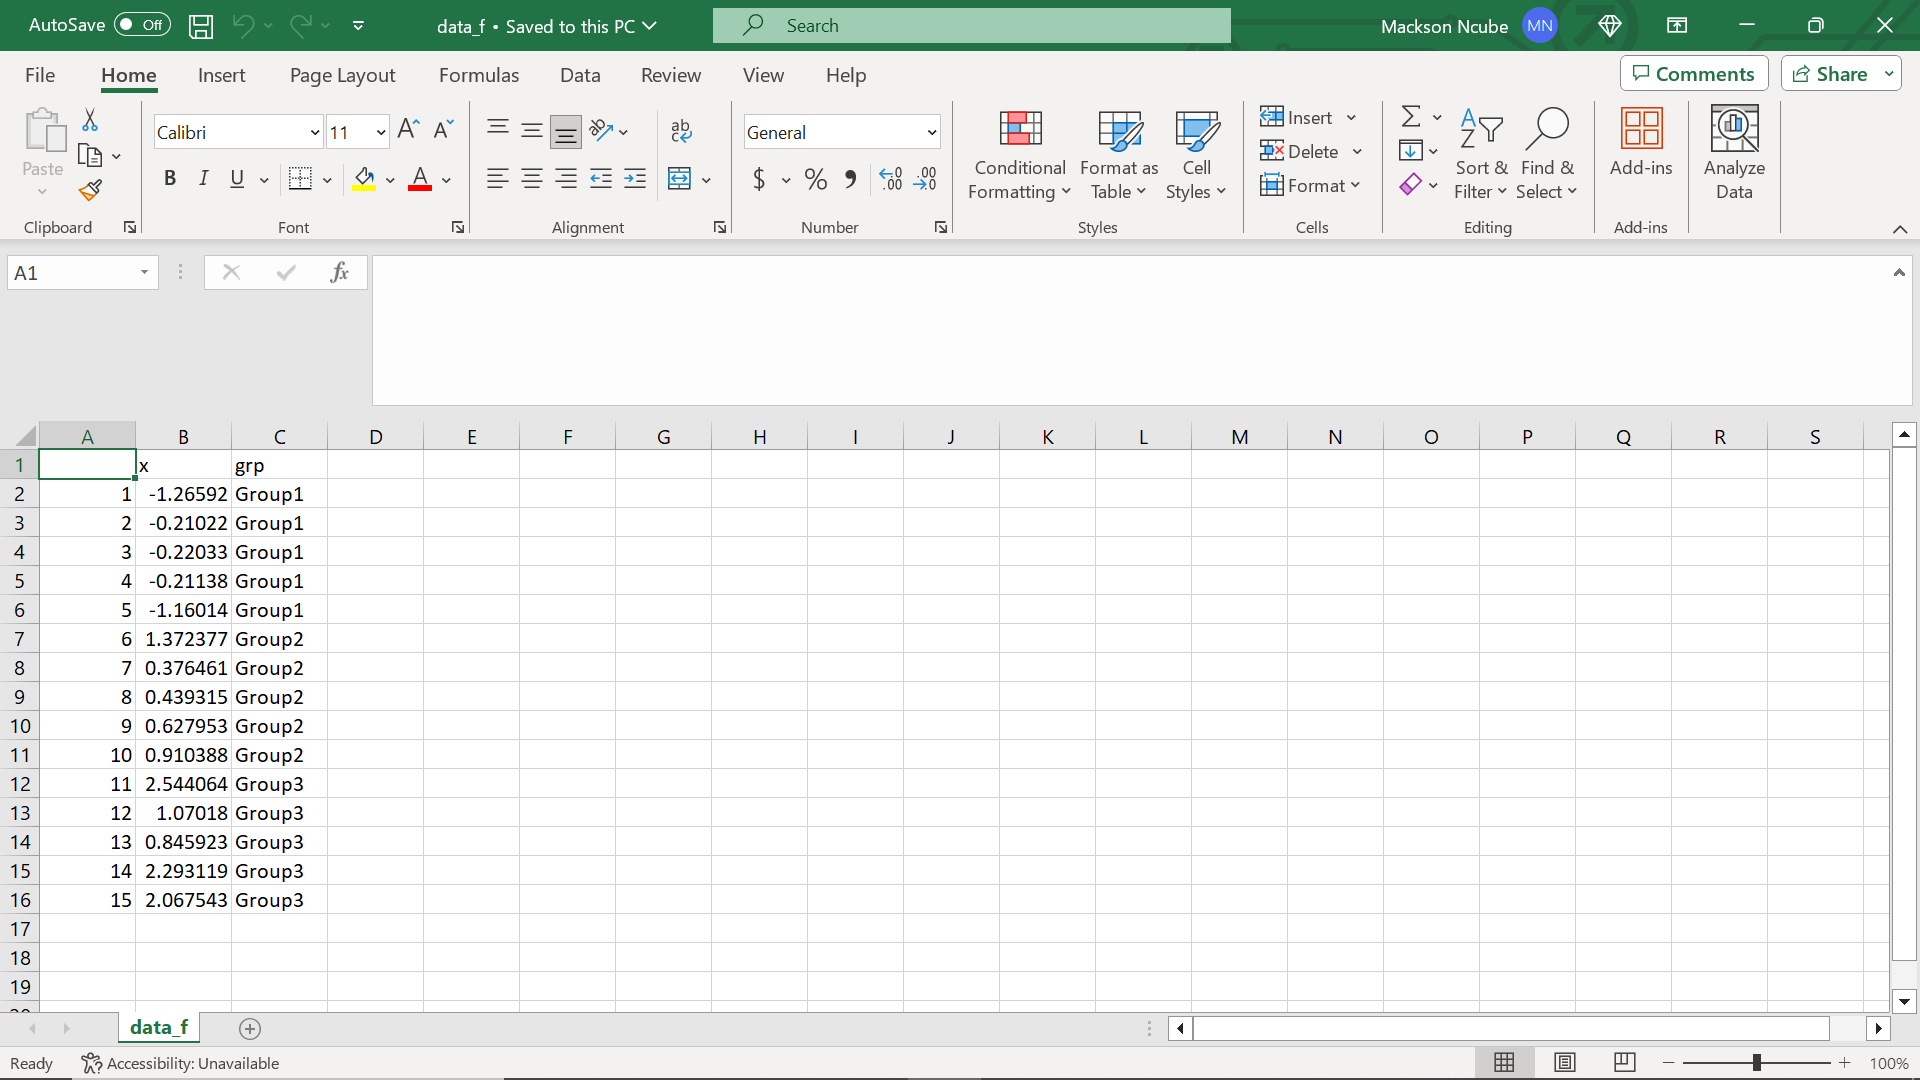
Please note the row names in column A and pay attention to how this shows up in the application. In the Upload CSV File section of the application, click Browse to find this data set on your computer and read the data into the app.
Once your upload is complete, you should see the following on your screen:
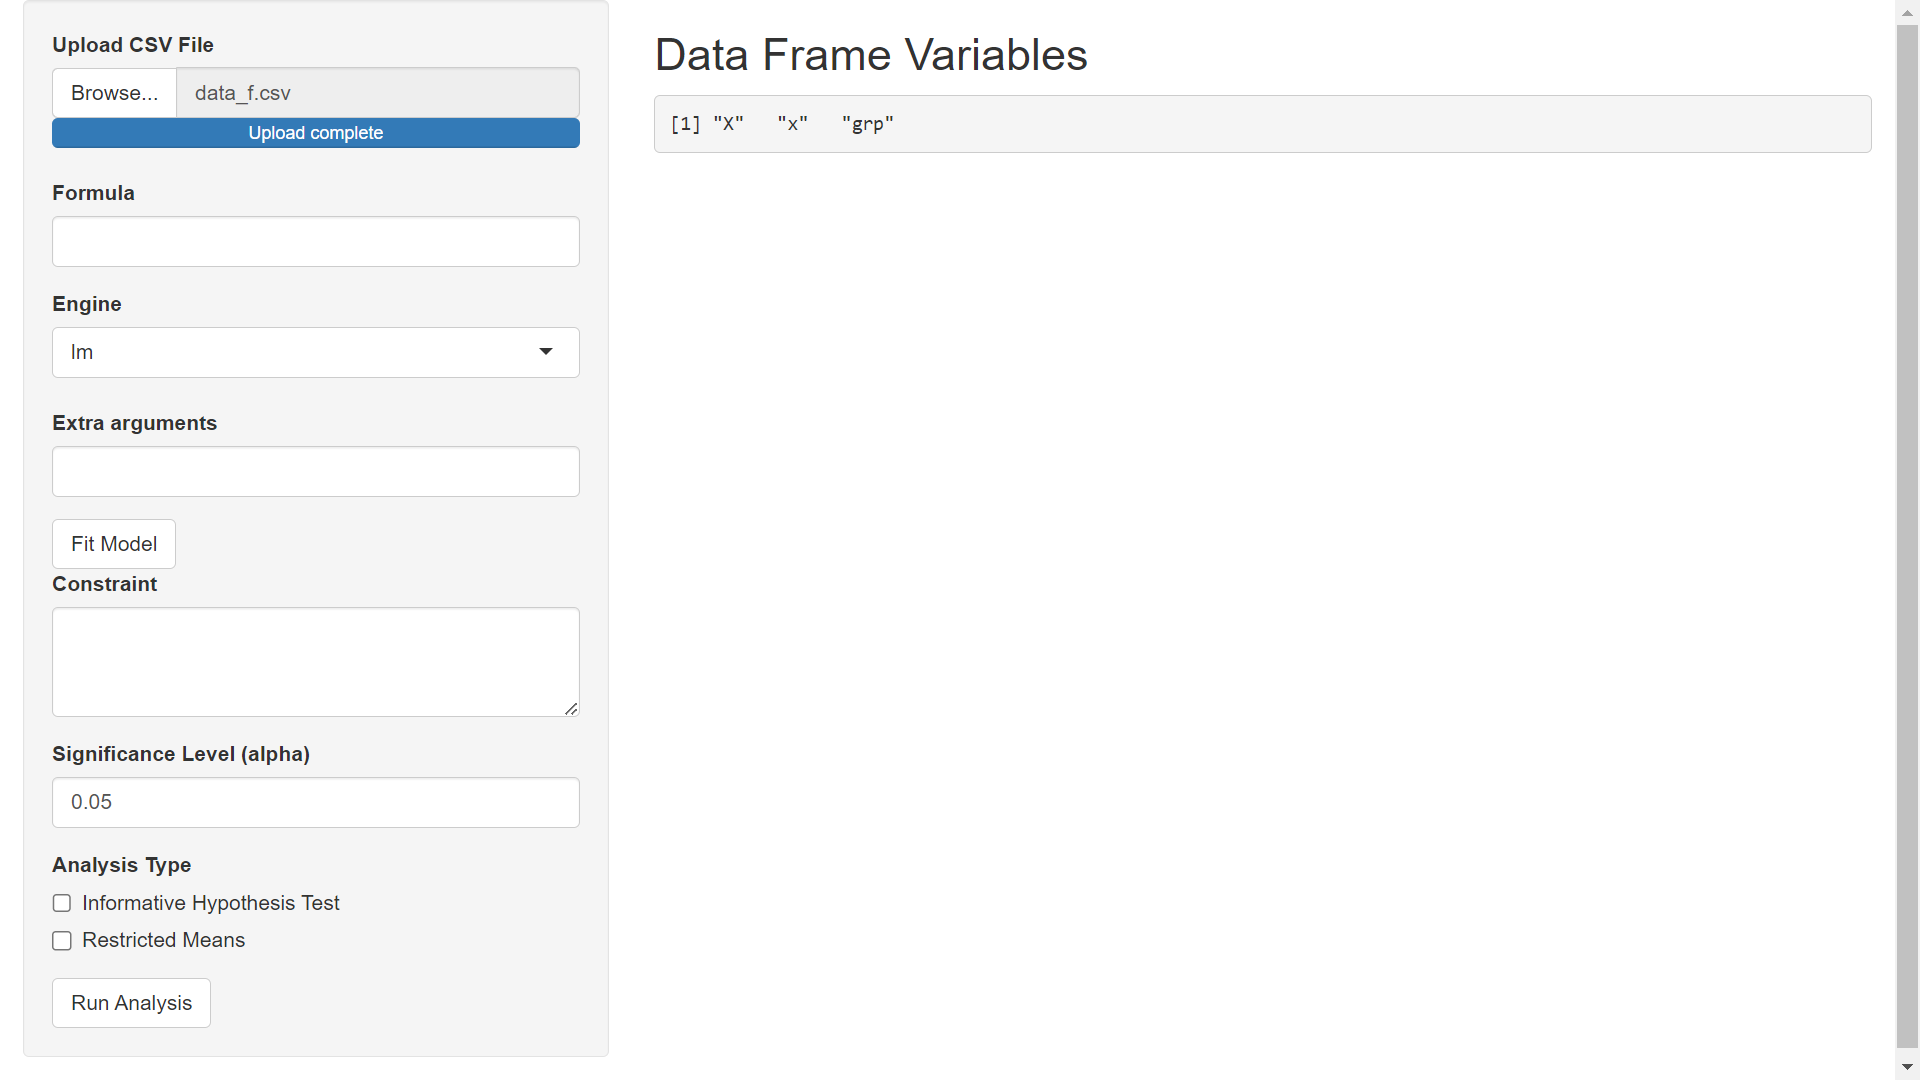
Notice that the row names show up as the column "X"; this is due to the way that I originally exported the R dataframe to csv. The other two variables are the "x" and "grp" variables from the data_f.csv file; these two variables can be used in our model formula.
Step 3) Model Specification
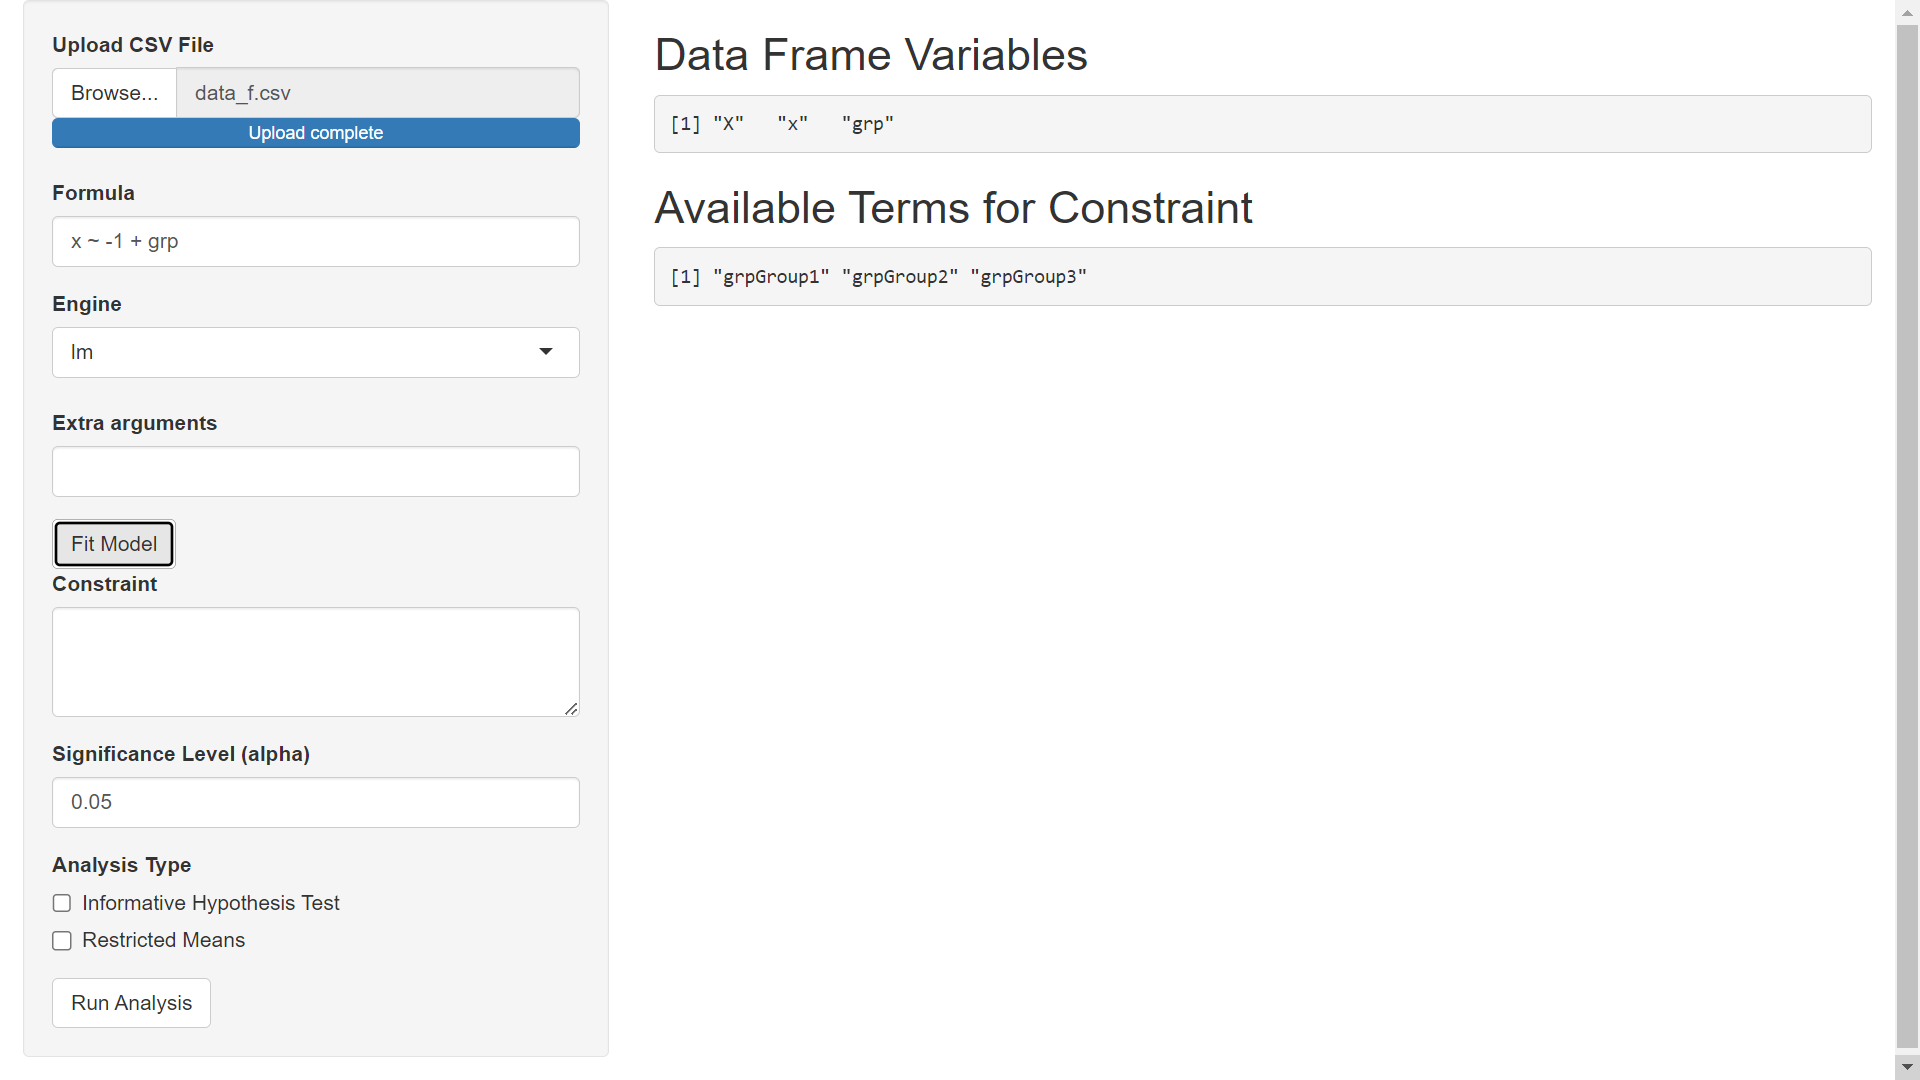
In what follows we will use the 'lm' engine to fit a model using the stats::lm function from R. Specify the Formula as x ~ -1 + grp (using -1 to remove the intercept so that none of our grps are used as a reference level). The Extra arguments field can be used to pass extra arguments to the model fitting engine (stats::lm in this example but stats::glm or MASS::rlm if a different engine is selected). In this example, we will not pass extra arguments to stats::lm. After specifying model details, click the Fit Model button to get the following screen.
Step 4) Specify Constraint
Using the terms available for constraint, specify the constraint. Visit the https://restriktor.org/index.html homepage for a basic overview on constraints and then proceed to https://restriktor.org/tutorial/syntax.html for further discussion.
Please notice that when defining constraints in R, we wrap the constraint in '' (i.e., single quotes) whereas in the mmirestriktor Shiny app, we do not wrap the constraint in single quotes.
For our example we will use the constraint: grpGroup1 < grpGroup2 < grpGroup3.
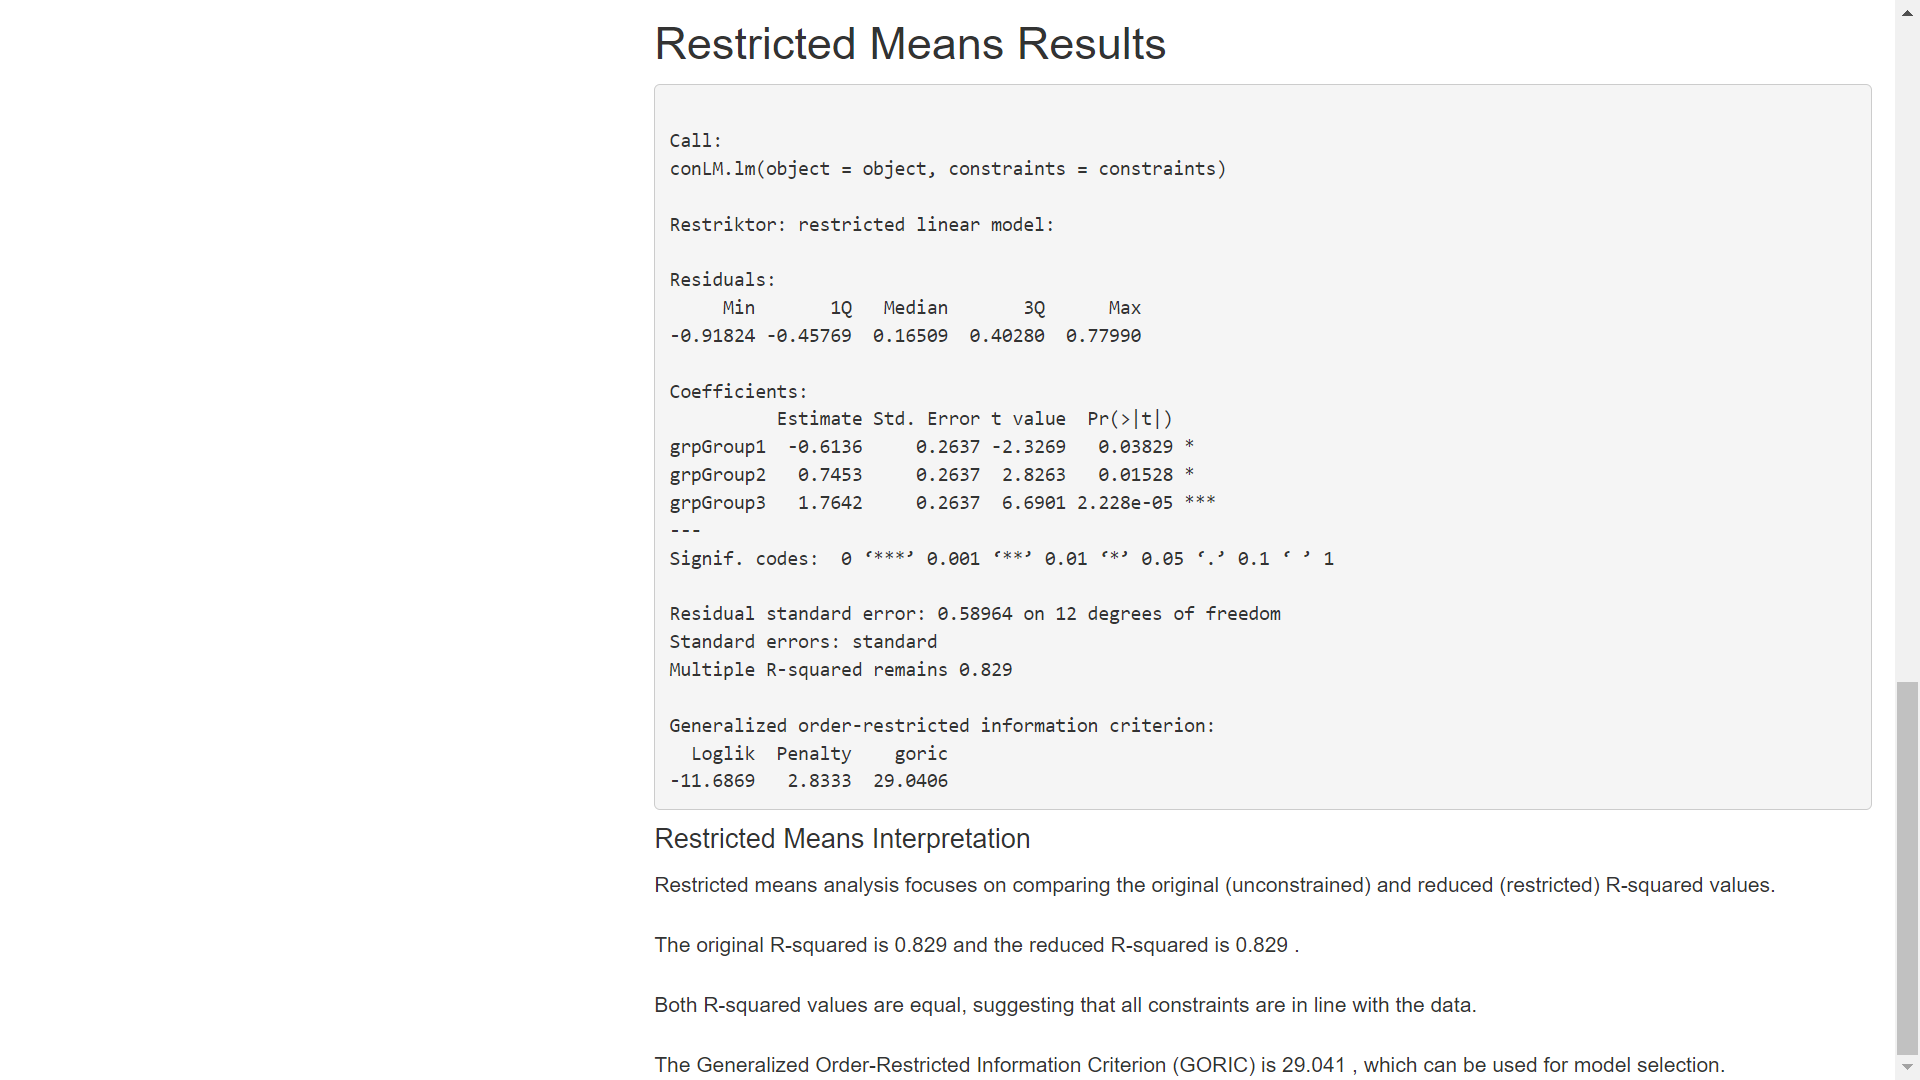
Step 5) Run Analysis
We will use the default 0.05 alpha level and select both analysis types. After specifying the constraint, selecting an alpha level and analysis type, click Run Analysis to get results:


This blog post covered the basics of using the mmirestriktor app with the lm engine. A future blog post will cover the glm engine which will incorporate the Extra arguments field to set the stats::glm family parameter. There should also be a future blog post with a continuous predictor in order to discuss how the mmirestriktor app standardizes numeric predictors before fitting the model.